Your Blogging Mentor

  • Home
  • About
  • Courses
    • 5 Days to a Successful Blog Launch
    • Blog Start-Up 101
    • WordPress 101
    • Branding Basics 101
    • Content Creation 101

How to Use Trello as an Editorial Calendar

Blogging Tips • WordPress Tutorials 15 Comments

117 shares
  • Facebook44
  • Twitter

Have you heard the term “editorial calendar” and wondered what it meant? Or have you always wanted to set one up but you just needed someone to show you how? Or maybe you are feeling overwhelmed with trying to stay organized and have quality, fresh content as a blogger? If you answered yes to any of these questions, I think you’ll find today’s guest post incredibly helpful! -Crystal

Guest post by Tracy Kulwicki at Working Moms Balance

Creating consistent content for your blog is really important, but it can also feel like you’re on a hamster wheel, never able to keep up. You come up with a few great ideas in a row and get them written and published while you’re feeling inspired.

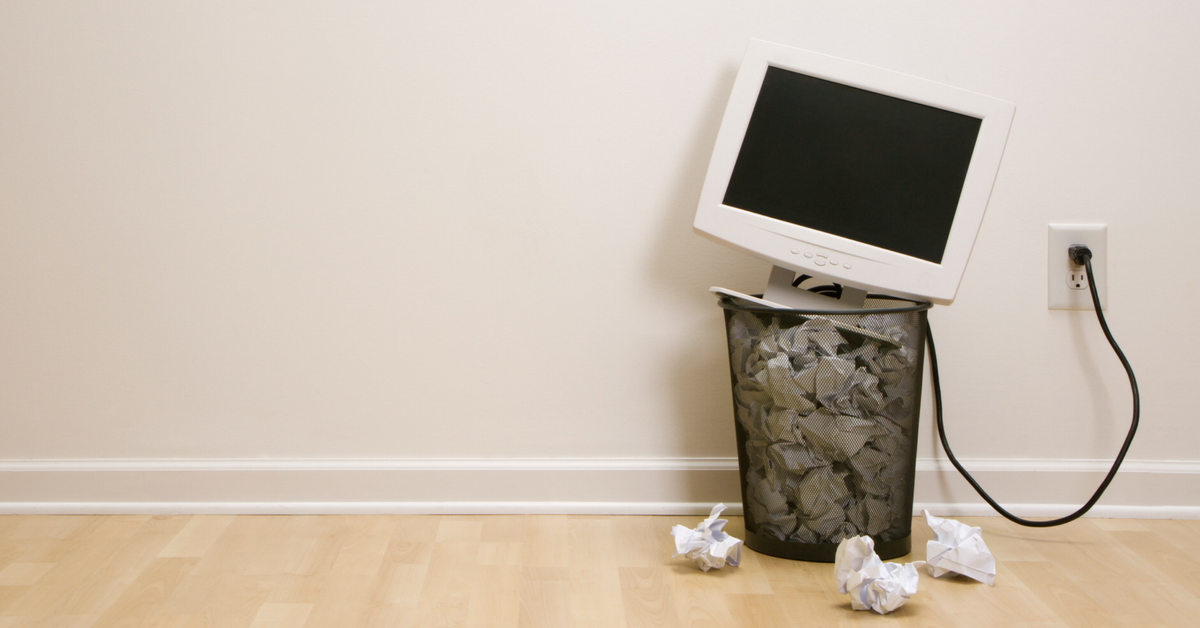
Then suddenly, it’s as if the well has gone dry. It’s the morning of your regularly scheduled posting day, and you’ve got nothing but a blank screen staring at you.

This is why having a plan, also known as an editorial or content calendar, is vital to your success — or at least a less-stressed version of success.

I’ve tried so many different options for creating an editorial calendar including, a simple paper and pen, an Excel spreadsheet, a WordPress Plugin, Google Calendar, and I’ve finally settled on using Trello. And it has been the perfect solution.

What is Trello?

Trello is a project management application that can help you organize and manage a variety of different projects. You can access Trello online through their web application or desktop application.

They also have a very handy mobile app (iPhone and Google Play) to help you manage your projects on the go. Best of all, Trello is completely free for all the features you need for creating an Editorial Calendar.

Through the use of lists, cards, boards, labels, and even handy collaboration tools you can create a very organized plan for the content creation on your blog. Trello also includes a Calendar “power up” feature that makes it a perfect option for creating an Editorial Calendar.

How does Trello work?

Within Trello you will be able to create a number of boards. Boards are essentially created for each project or master category you want to organize through Trello. Besides my Editorial Calendar board, I have a board for product and freebie ideas that I’m brainstorming and working on, as well as a board that helped me create and manage a recent email challenge that I ran on my blog.

Within each board, you will create a number of lists. Lists are the various categories that you want to create for your project, you might think of lists as the stages of the project. Each list will house the cards that are currently in that stage of the project.

Within each card, you can include a description, images, attachments, assign dates and collaborators, labels, comments, and more. You will then be able to drag and drop your cards as they progress through your stages (the lists).

I’ll walk you through how I personally have my Editorial Calendar board setup so you can see how this process works.

How to Use Trello as an Editorial Calendar

Lists

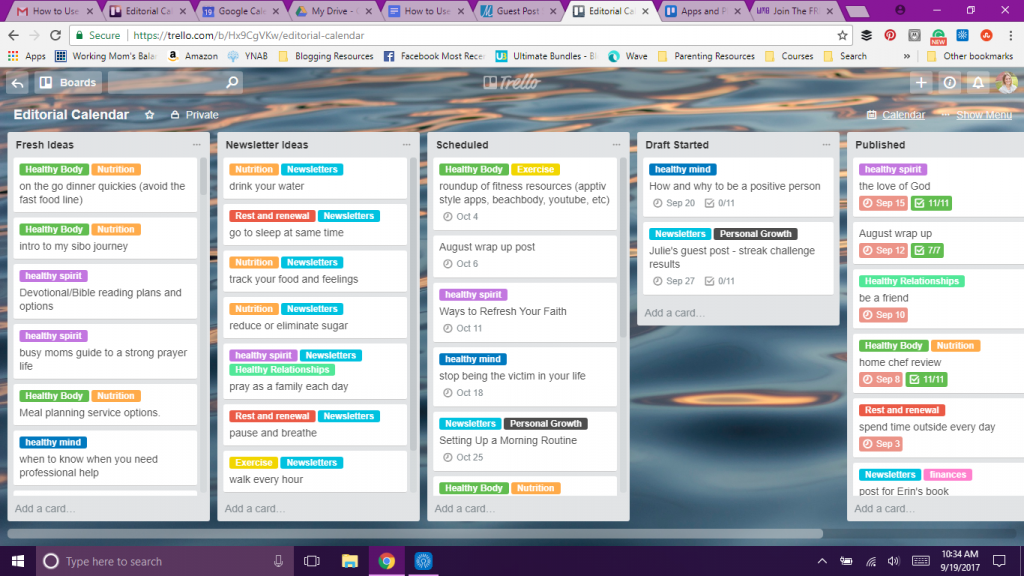
Once you have your Editorial Calendar board setup in Trello you will want to start creating your lists. You do this by clicking “Add a list” and typing the names you want. Again, these are most likely going to be the various stages that your post will go through from initial idea to published post.

Here are the lists that I have on my editorial calendar:

  • Fresh Ideas (where I put every blog post idea I come up with during brainstorming sessions)
  • Newsletter Ideas (my newsletters include some kind of weekly health-related challenge so this is where I keep track of my challenge topic ideas)
  • Scheduled
  • Draft Started
  • Published

All of my cards begin in either the Fresh Ideas or the Newsletter Ideas list. I’ll usually set aside time at least once a month to brainstorm content ideas for all of the categories on my blog. I use pen and paper for the initial brainstorm and then create a card in Trello for each idea I come up with. I’ll talk more about setting up the cards shortly.

Every month or two I will browse through my ideas lists to decide what topics I want to cover in the upcoming weeks and months. I’ll then pull those cards from the ideas lists to the scheduled list.

Once I begin an outline or a draft of a post, the card moves to the Draft Started list. I try to have at least a couple posts in progress at all times so I’m not always scrambling at the last minute. And finally, when the post is complete and either scheduled or published I’ll move the card to the Published List where it will rest forever.

Cards

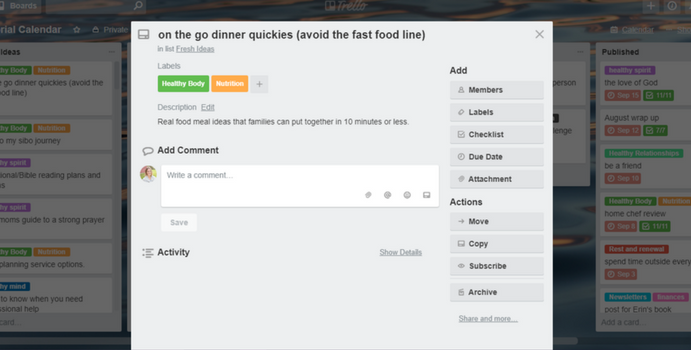
Cards can hold a lot of information. When I first create a card I will type my initial brainstormed idea as the title of the card. Generally, this is just a working idea and will not be the final title of my post.

I also immediately add labels for each new card. I use the labels to identify which of my various blog categories and subcategories the post will fall under. I try to rotate through my blog categories throughout the month, so adding the labels from the beginning helps me to visually verify that I’m covering each blog category on a consistent basis.

If I have additional ideas or thoughts I want to make sure to include in the post I will add those in the description section of the card.
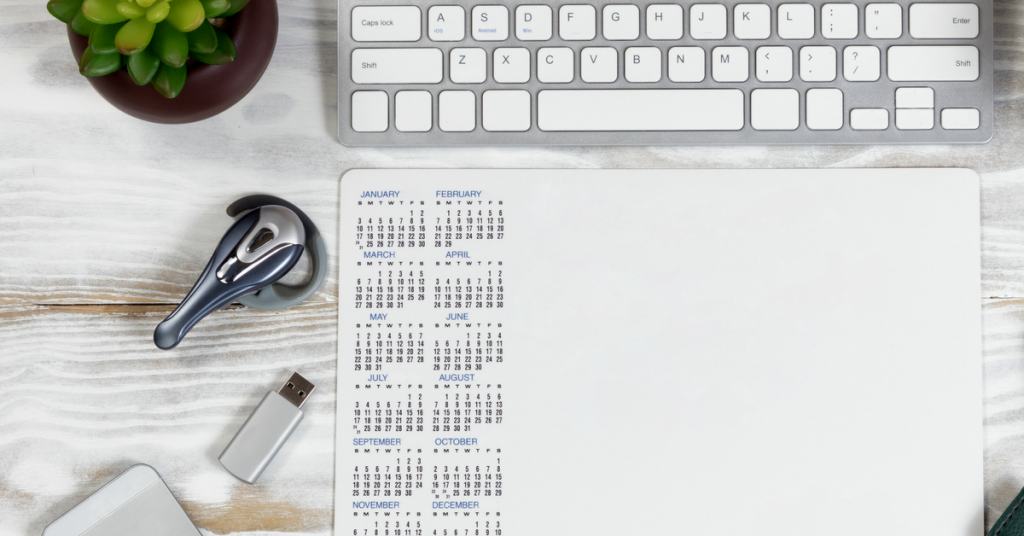
Calendar

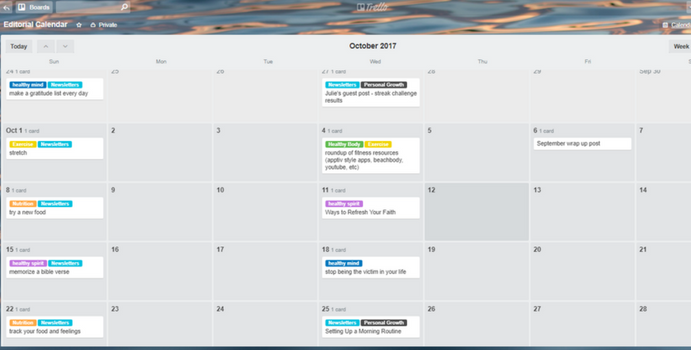
Once I move the post to the Scheduled List I add a due date. This places the card on the calendar. You will need to add the calendar feature to your Trello board. The calendar is an optional “Power Up” feature you will find in the main menu. (You get one “Power Up” per board on the free plan). Once the calendar is added you will see a little button toward the top right of your screen that will toggle you to the calendar view.

Within the calendar view, you will be able to access any card, on any list that has a due date assigned. You can drag and drop the cards to different dates in the calendar view and it will change the due date on the card.

You can also add your Trello Calendar to your Google Calendar if you like to see everything in one place. In the “Power Ups” section of the Trello menu, you will see a gear appear after you have enabled the Calendar “Power Up”. Clicking on this gear will allow you to enable the iCalendar feature.

Once you’ve enabled this feature, Trello will add a link to your calendar feed.  You then add this link to the “Other Calendars” section in your Google Calendar by choosing “Add by URL” and pasting the link. You will not be able to make edits to your cards from Google Calendar, but clicking on the calendar items will provide you with a link to your Trello card where you can make changes from there.

Checklists

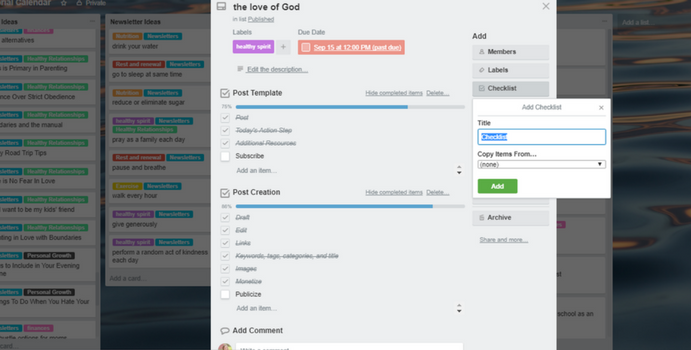
Because I work a full-time job and work on my blog in my spare time, I don’t usually get a several hour block of time to create a blog post from start to finish all in one sitting. I learned that I need a system to help me keep track of where each post is in the creation process so that nothing is missed.

Trello has an incredibly handy Checklist option where I have created two checklists that I can add to each of my cards. As I work on the post I can check off the items I’ve completed to better keep track of where I am in the creation process.

Once you create a checklist on a card, Trello saves that checklist and allows you to copy the items from your checklist to a new card. This way you don’t have to keep creating the same checklist for each card. When I move the card into the Draft list I add my saved checklists to the card to keep track of my progress.

When you add a checklist you will see a counter on the card in the main list view so you can easily see how close each post is to completion according to the steps on your checklist.

Attachments and Other Features

There are additional items that can be included in each card depending on how you create your post. You can add members if you have a team you collaborate with to create your cards. There is also the ability to add comments to a card if your team members want to discuss their progress or issues.

Another handy feature on the cards is the option for adding attachments. You can attach a Google Drive, DropBox, or OneDrive link or add an attachment from your computer to each card if you want to have your post draft or images easily accessible from within Trello.

There are so many awesome features with Trello that it might seem a little overwhelming at first, but once you get started you will love how organized and put together you will feel. Using Trello has helped me to finally create a posting plan that works and makes sense for my busy life. I hope it works for you too.

Tracy is a wife, working mom of two, a runner, and blogger. Her blog, Working Mom’s Balance provides realistic ideas to help working moms prioritize their health – mind, body, and spirit. She believes that the best way to manage our busy lives is to put our health at the top of the list.

Want more in-depth help creating your own content system? Check out our latest course, Content Creation 101!

Confused and frustrated by WordPress? Here’s help!

Blogging Tips • WordPress Tutorials 2 Comments

11 shares
  • Facebook10
  • Twitter

As you know, we launched our first full-length blogging course back in July called Blog Start-Up 101, and the response was fantastic! SO many of you have emailed me expressing just how much this course helped you get your dream blogs started.

I am so humbled and grateful for the opportunity to share my 12+ years of blogging experience with so many of you! It’s truly been a huge blessing for me and my team.

One of the big goals I have for YBU™ is to build a blogging skills training platform that grows with my students — being your mentor for each step of your journey.

That’s why I’m SO excited to introduce you to the next course in our YBU™ Beginner Blogging program, WordPress 101. This is our second of many full-length beginner blogging courses we plan to release over the next year, and you are the first to know about it!

The fear and intimidation of learning WordPress is one of the most common reasons new bloggers fail to get their self-hosted sites off the ground — especially for those of us who aren’t very techie (I’m right there with you!) 

But WordPress doesn’t have to be the lone barrier that keeps you from accomplishing your blogging goals! That’s why we created a brand-new course called WordPress 101. This course was designed to break down that barrier and bridge the gap so you can spend less time banging your head against the wall trying to learn this platform and more time doing what you love — sharing your voice with the world!

Here’s What This Course Will Teach You

WordPress 101 includes detailed lessons and video tutorials. Here are some of the topics covered:

  • Step-by-step instructions to help you start your own self-hosted WordPress blog if they don’t already have your blog up and running
  • How to install and access your WordPress site after it’s been set up
  • An in-depth tour of their WordPress Dashboard so you know how to use it effectively
  • Details of each of the WordPress Menu options and submenus so you know where everything is and how to use each option
  • How to use the WordPress Editor to create and publish or schedule new blog posts and pages
  • In-depth instruction on creating and using categories and tags to organize your posts and pages
  • How to use the WordPress Customizer to help you change the look of your theme to fit your taste
  • What plugins are, how to use them, and how to install them, including some of our favorites!
  • How to moderate, manage, and reply to comments on your blog, including how to keep the comment spammers at bay!
  • Important information on site maintenance, including backups, updates, and troubleshooting common issues.
  • PLUS bonus tutorial videos designed to take students step-by-step through important topics!

Here’s What You Get When You Purchase

When you purchase this course, you’ll get:

  • 5 self-paced, easy-to-understand lessons covering the most important WordPress topics.
  • Detailed video tutorials with each lesson showing you visual how-to’s to make WordPress less intimidating so you can use this powerful blogging tool with ease.
  • Daily assignments to help you stay on track and implement new WordPress tips and strategies.
  • Printable PDF workbook including the entire course lessons to make studying easier on the go!
  • BONUS video tutorials, recommended resources, and more!

Get All of This for Just $37!!

My goal in producing this course is not only help de-mystify WordPress, but also to give people like you an incredible bang for your buck. I think the course is worth every bit of a $97 value, but I have priced it at $37 because I want beginners to be able to afford it.

—->>> Go here to purchase it for just $37! <<<—–

How to Choose a Blog Name

Blogging Tips 9 Comments

73 shares
  • Facebook18
  • Twitter

Are you struggling to choose a blog name? This is one of the most important parts of setting up your blog. And picking a blog name is not one that you want to go about quickly or without a lot of thought and intention.

How to Choose a Blog Name

Your blog name should encompass your blog’s mission and should clearly articulate your blog’s purpose. Don’t hurry through the process of picking your blog name; it’s your brand and you want to make sure you love it and it’s something you’re going to love for years to come.

With this in mind, here are 7 questions you should ask before you decide on a blog name:
Continue Reading

My New Mantra: Focus & Finish

Blogging Tips 42 Comments

238 shares
  • Facebook17
  • Twitter

Ever feel like you just can’t get anything done? Like you’re working so hard but have nothing to show for it? That you just can’t seem to focus on the task at hand because you’re so distracted by so many other things you need to do or want to do?

I get it! It’s so easy to feel like you have 468 projects and to-do’s and goals you really should be working on.

You read a post and you feel like you must do this. Then, you listen to a podcast and it says you have to do that. Later on, you watch a webinar and you realize you aren’t doing yet another thing you really should be doing.

It can become overwhelming and exhausting to try to keep up with all the things you are told you must. do. NOW.Continue Reading

3 Things to Do When You Make a Mistake as a Blogger

Blogging Tips 20 Comments

54 shares
  • Facebook10
  • Twitter

Not too long ago, I recorded a Facebook Live video making Whole-Wheat Chocolate Chip Pancakes — and it was a near disaster.

Now let me say this: There are so many wonderful things about Facebook Live and live video. It allows you to connect with your audience at a much deeper level. It allows you to share things in a more personal and authentic way.

But the whole deal about it being a Facebook Live means that it’s really and truly that — it’s LIVE. There’s no taking it back. Which is one of the upsides and downsides to it! 🙂 Yes, you can always delete it afterwards, but you can’t erase what people who saw you live saw.Continue Reading

How to Grow Your DIY Blog with Hometalk’s Blogger Traffic Program

Blogging Tips 33 Comments

52 shares
  • Facebook24
  • Twitter

You can grow your DIY blog traffic using Hometalk's blogger traffic program! Find out more here!

Guest post by Karen from ToWorkWithMyHands.com

If you’re a DIY blogger, you’ve probably heard of Hometalk, the world’s largest DIY community. What you may not know, however, is that Hometalk has a Blogger Traffic Program which offers DIY bloggers the opportunity to dramatically increase their blog traffic and online exposure.

Continue Reading

My #1 Tip to Get People to Comment on Your Blog

Blogging Tips 40 Comments

125 shares
  • Facebook23
  • Twitter

Do you feel like you are speaking in a vacuum? That you work so hard to put content out there and no one seems to be paying attention?

Do you wish you could figure out how to get people to engage and interact with your content by leaving comments, sharing your content, telling others about you, contacting you through social media, and sending you emails?

Here’s my number one tip to get more people to comment on your blog and interact with your content more:

Continue Reading

5 Necessary Traits of Successful Bloggers

Blogging Tips 27 Comments

46 shares
  • Facebook23
  • Twitter

If you want to be a successful blogger, here are five qualities I believe you must possess:

1. Successful Bloggers are Marathoners, Not Sprinters

Anyone can be a successful blogger, but unless you’re already a celebrity, there’s no such thing as overnight blogging success. It takes hard work, sweat and more hard work. It may be a few months before you ever see a penny from your hours of labor invested into your blog.
Continue Reading

« Previous Page
Next Page »

ABOUT ME

Hi there! I’m Crystal Paine, wife, mom of three, veteran blogger (12+ years!), New York Times bestselling author, speaker, business consultant, and founder of MoneySavingMom.com.

Recent Posts

Why Constructive Criticism is Your Best Friend

What To Do When You’re Stuck in a Blogging Funk

What To Do About the Recent Amazon Affiliate Commission Changes

4 Ways to Effectively Engage & Nurture Your Email List

8 Ideas for Collaborating with Other Bloggers & Influencers

My Other Sites:

RSS Latest from MoneySavingMom.com

  • 20+ Simple Vegan Recipes on a Budget! (Breakfast, Dinner, Dessert, and Snacks)
  • FREE Summer Bucket List for Kids!
  • 6 Strategies to Kickstart Your Morning Success (for FREE!)
  • We’re Hiring!
  • A Peek into March
  • Home
  • About
  • Contact
  • Privacy Policy
  • Terms of Use
  • Disclosure Policy
  • Affiliates
         
© 2017 yourbloggingmentor.com | ALL RIGHTS RESERVED | Design by Second Breakfast Media