Are you trying to improve your SEO but you’re worried you have a lot of pages giving 404 errors on your site? Read this to learn the best way to check for broken links!

Guest post by Micah Klug of HomeFaithFamily.com.
A study recently conducted found that there are now over 500 million blogs across the world, and this number is increasing every year.
This number both excites and worries me.
I’m excited that there’s a variety of opinions, ideas, and opportunities for people to help each other while finding fulfillment in expressing their thoughts and sharing their expertise.
After all, you’re here because you have a blog and want to learn how to grow your business!
But it also worries me, because with that many blogs on the Internet, I know that many of them probably have inactive pages and broken links.
It’s really easy to have broken links on your site and not even know it. And the longer your site has been around, the more likely it is that you have broken links.
Why Broken Links Matter
You’re probably wondering why broken links even matter, so before we go any further, I wanted to answer a few basic questions about broken links.
When a blogger changes a URL address without correctly updating the URL, a broken link is created. In other words, when searchers (and/or Google web crawlers) browse through your site and click on a link that no longer works, they may be directed to a page with a 404 error.
Yes! One of the ways search engines rank websites is by crawling their links. If there are dead links on your website (you linking to broken links or you creating a broken link on your site without fixing the URL), it can stop search engine spiders from crawling your site and indexing it. This has a negative consequence on your SEO and your site’s domain authority.
When a reader is browsing your site and clicking on links from various pages, you want to make sure the links work. If a reader comes across a broken link and gets a 404 error, that affects the reader experience and they’re much more likely to leave your site. You want to have an easy-to-navigate site that doesn’t create any dead ends for your reader.
The same things goes for external links that you’re using. When you recommend a product on Amazon or link to an outside source, you’re encouraging your readers to click on a specific link. When this link leads to a broken webpage or a product that’s no longer available, your recommendations are no longer helpful to your reader, causing a negative experience.
The Easiest Way To Check For Broken Links
Although there are businesses dedicated solely to helping you with broken links, the easiest way I have found to consistently check my website for broken links is through a free plugin called Broken Link Checker.
After you download and activate this plugin on your site you will need to set how often you’d like this plugin to check for broken links.
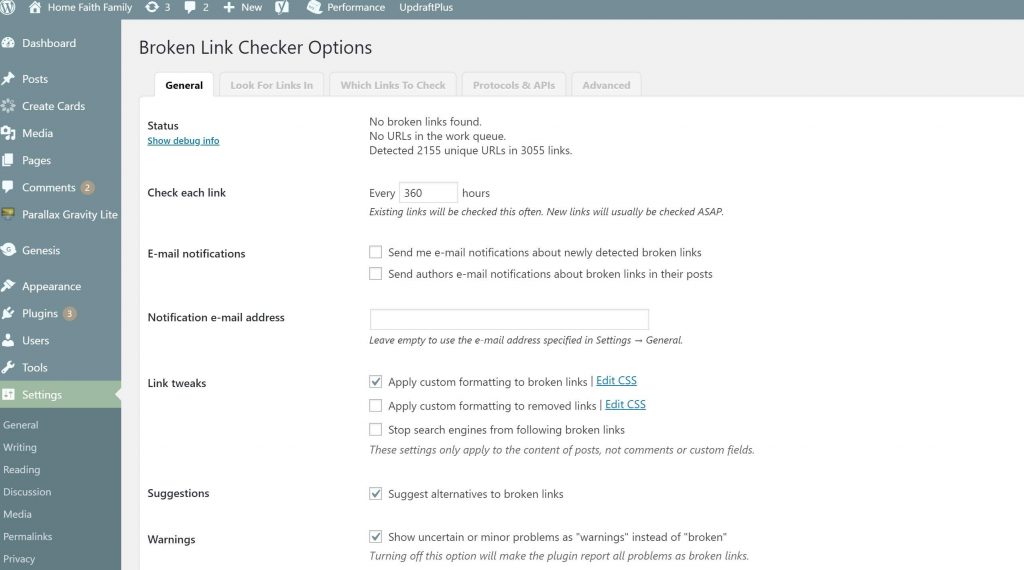
I have this plugin check my broken links every 15 days (or 360 hours).
A word of warning: once this plugin starts checking for broken links you will notice “spikes” of link clicks in your Amazon reports match up with how often you want your links checked.
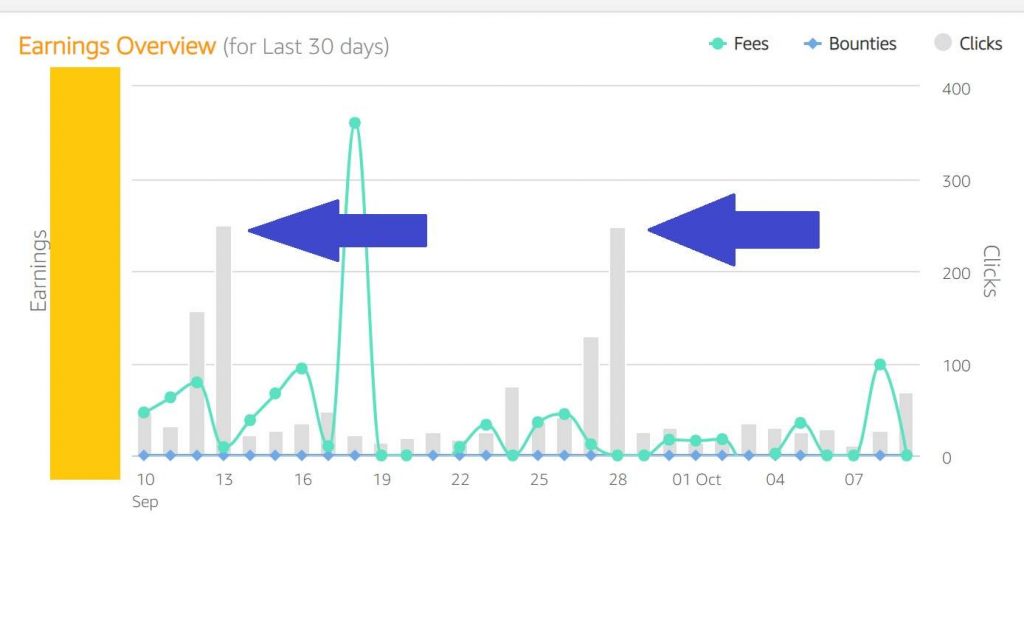
This is the plugin “clicking” the links on your website to confirm the products you recommend are still available. This will affect your click-through rate report.
Using the Broken Link Checker
This first time the Broken Link plugin scans your site, it could take a really long time — especially if you have a lot of posts and pages published. So just be patient!
For my site with a little over 200 posts, this plugin ran in the background for about 15-20 minutes the very first time I ran it.
One of the features I love about this plugin is the ease of access in seeing which links are broken and how you can quickly fix them.
You can access your broken links from your WordPress Dashboard:
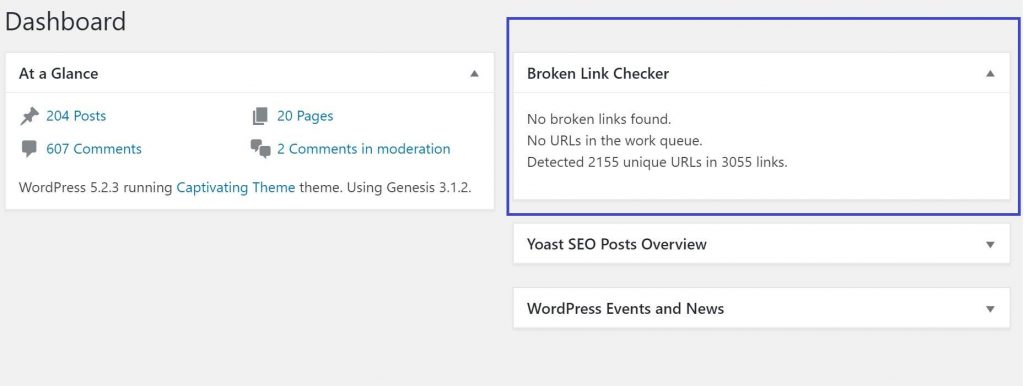
If you don’t want this cluttering your Dashboard, you can also see all of your links under Tools –> Broken Links.
Be Proactive By Using Redirects
Let’s say you wrote a new blog post and you now want to change the URL. When you go to change the URL, the old URL will now be a broken link.
Instead of waiting for the plugin to “catch” the broken link and have this affect your SEO health, you can proactively create a “redirect.”
A redirect is when you send an old URL — one that you no longer want your site associated with — to a new URL.
For example, let’s say I create a delicious cherry cheesecake recipe and I decide to be “clever” and call it, “MYWEBSITE.COM/grandmas-secret-family-recipe.
Do you think this URL is going to get me much search traffic? No.
Unfortunately, Google doesn’t reward you with search traffic for being clever.
In keeping with this example, let’s say I then do my keyword research and find that “easy cherry cheesecake” has over 3,000 monthly searches.
Because of this, I decide to change my old URL to this new SEO-friendly URL. That’s great! But now I have a “broken link” (my grandmas-secret-family-recipe) that I need to redirect to a “new link.”
How to Create a Redirect
There are two easy ways to create a redirect from an old URL to a new URL:
- If you have the paid Premium version of the Yoast plugin, Yoast does this automatically for you. (This is one of the reasons I love their paid plugin!).
- If you only have the free version of Yoast, you can instead download and activate a free plugin called Redirection.
If you’re using the free Redirection plugin, you can access all of your redirected links in Tools—>Redirection.

To create a new redirect, simply click “Add New” and follow the prompts to enter your old URL and your new URL.
{Below is an example of what some of my old URLs looked like before I did keyword research.}
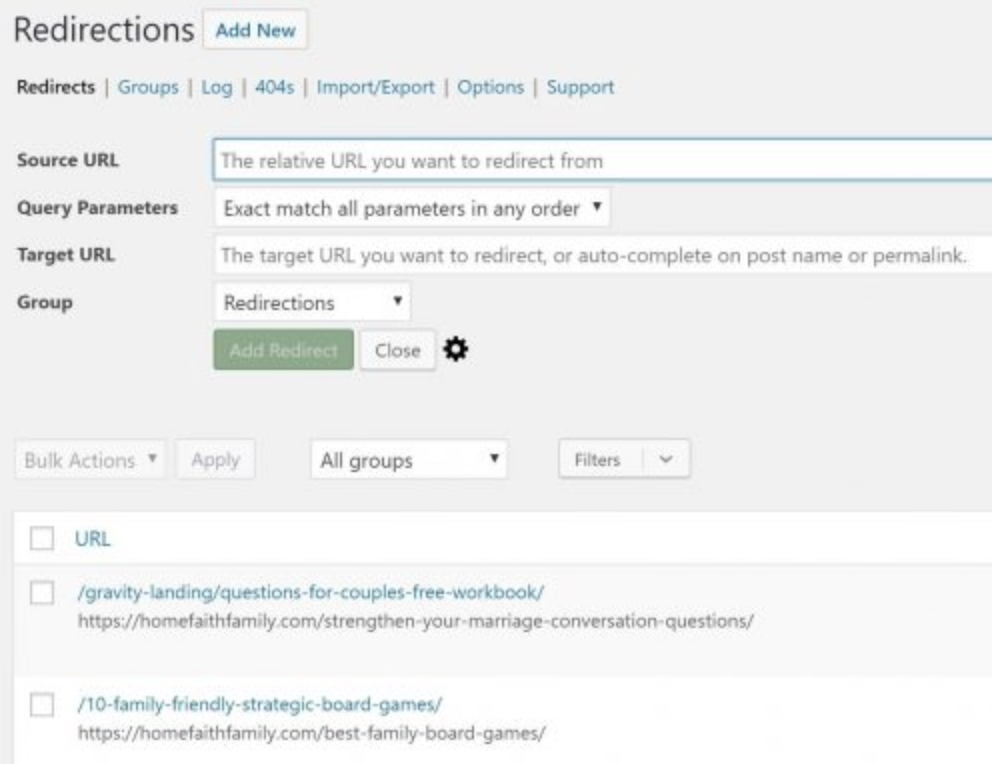
From these link checking options, you’ll be able to access your links, edit your broken links without having to go into each individual post, and increase your site’s SEO health.
Thank you so much for this post! I had several broken links on my blog that I had no clue about! Fixing them now! 🙂
I’m so glad you found this post useful, Sarah! I hope you have a great day.
As always, thank you for the awesome information!
How do you handle broken links that are in comments? Do you delete the comment?
Awe, thank you so much! In answer to your question, when I find a broken link in the comments I will “unlink” the URL from the comment. If you’re using the Broken Link Checker plug-in, you have the option to redirect, edit URL, delete, or unlink. (This way you can keep the comment on your post.)
Hello Micah,
Thank you for sharing this helpful information! I installed the Broken Link plugin after reading your article, and I’ve found it very useful. However, fairly often I find Amazon links listed as broken, but when I check them, they seem fine. Do you ever run into this problem?
Hi Diane! Thank you for your question, friend. I have run into this problem before. If you do a little digging into the code, sometimes the plugin will count a link “broken” if the server (such as Amazon’s) is taking longer to load or has a difficult time connecting. I will encourage you to check the link (especially with affiliate links on Amazon) because you never know when something might be out of stock, or no longer sold on Amazon. This way, you can find a suitable product to share with your audience.